My family always had a big vegetable garden when I grew up and I have many memories of tending it with my dad and enjoying the fresh veggies we grew. That was a long time ago and last year was the first time that I had a big enough yard to start my own garden. Now that the winter snow has finally melted and I can see the garden again, it's a good time to review the key things I learned from my first year of gardening...
#1 - Protect The Garden From CrittersI knew bugs and
slugs could be a problem but didn't realize how many rabbits and deer are in our new neighborhood. They quickly put a hurtin' on my unprotected plants. Eventually I found a way to keep them out that still allowed me easy access to the plants. Lesson here is to defend the garden early and well before the first critter gets into it. Once he does and finds that delicious buffet line, he'll tell his buddies.
#2 - Cherry Tomatoes Grow Like CrazyI put in 1 grape and 2 "Sweet 100" cherry tomato plants (we love fresh cherry tomatoes on our salads). The grape tomatoes did well but the cherries would've taken over the entire garden if I'd let them! Both plants shot up and out with at least 4 or 5 new trunks growing out from the base. We had so many cherry tomatoes I was taking them to work for a healthy snack every day. There were dozens that fell off the vine because we couldn't pick them all in time.
#3 - Space Out Tomato PlantsIn addition to the cherry and grape tomato plants, I had one each of Big Boy, Better Boy, Early Girl and
Cherokee Purple planted in about 18 square feet of the garden. This was way too dense...the 2 cherry plants could've taken up that space by themselves. By the end of summer, all the plants (except the Cherokee Purple which suffered the most damage from the deer) were so large and interwoven that it was nearly impossible to tell the big tomatoes apart. This also prevented enough sunlight to get in to fully ripen some of the tomatoes and prevent rot.
#4 - Build Garden Beds Long & NarrowMy first raised bed garden is 10'x6'. I figured that a 6' width would maximize the square footage and I'd still be able to reach plants in the middle without stepping in and compacting the soil. What I didn't fully consider was that I'd need to put a fence around the whole thing to keep the critters out (see lesson #1). Reaching over or through the fence makes it difficult to reach the middle. Future beds will be 3' to 4' in width.
#5 - Start With Seedlings For Some PlantsIt took forever for my cucumber, zucchini and squash to get going. I had to reseed each of them. Maybe I did something wrong planting them or they didn't like the soil...I haven't figured that out yet. This year I'll start them indoors and transplant the seedlings.
#6 - Harvest Carrots On TimeI forgot that the seed packet had given a time to maturity for these. When I finally pulled them out of the ground, it was 30 days past their maturity. The carrots were tough in the middle and tasted bitter (this could also be a soil issue). I'll pay more attention this season and hopefully have better tasting results.
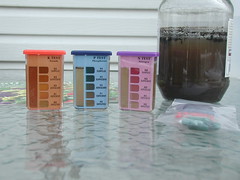
#7 - Soaker Hoses Work WellThese hoses are made from recycled tires and slowly weep water out over their entire length. It's a great way to water your garden and minimize water lost to evaporation.
#8 - Mulch The Garden To Reduce WeedsCovering the bare soil helps prevent weeds from taking root and keeps moisture in the ground for your plants. We never mulched our garden when I was a kid but someone recommended it and I'm glad I tried it. I used grass clippings as mulch and had very few weeds to pull. Straw, old leaves and shredded newspaper are some other things that can be used as mulch.
#9 - Mr. Stripey Tomatoes Rock!Mr. Stripey is an heirloom tomato plant that I bought because I wanted to try different heirloom varieties and this one looked cool with its red and yellow stripes. Unfortunately I planted it in a container on the deck using some old topsoil and it never thrived. It produced only one tomato...
an awesomely delicious tomato! Possibly the best I've ever tasted. It will get a proper spot in the garden this year.
#10 - Plan Your GardenBefore planting anything I plotted out where every plant would go on graph paper. Using different sized coins and other round objects I traced a spot for each plant based on its expected size at maturity. It's much easier to move things around with pencil and paper than when they're already planted. Even though I underestimated the full size of the tomato plants (especially the cherries), this chart helped me get the most use of my limited garden area.
#11 - Use The Right Stake For TomatoesMy dad rarely staked the tomatoes (or any plant) in our garden when I was a kid. I don't know why, maybe because we had so much space, maybe because his dad didn't. Since I have limited space in my garden, I bought bamboo stakes for staking the tomatoes. They worked well for the first month but once the plants reached a few feet high and started producing fruit, they pulled the bamboo stakes over. So I had to buy heavy duty 5' wooden stakes and drive those in next to each plant, possibly damaging its established root system. Now I know to use big stakes when planting and can avoid wasting time, money and risk of root damage.
#12 - A Garden Can Be Started Almost AnywhereI said at the top that last year was the first time I had a yard big enough for a garden. Well, it was really the first time I
thought I had a yard big enough. For most of my life I believed that a garden required a big yard. Last year I learned that's not true at all. Turns out I could've planted a garden in any of the small yards or decks I had before moving into this house. Whether it be a
salad box or a couple small raised beds, you can start a garden almost anywhere and start learning valuable gardening lessons. It only takes a little initiative and creativity.
What lessons have you learned about gardening?
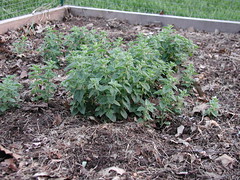 Plants can surprise you. Last year I planted a little oregano plant. It did well and we enjoyed fresh oregano all summer long.